Table component
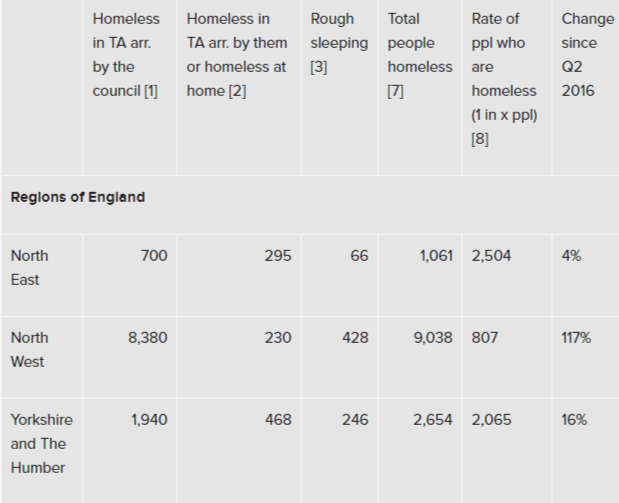
Shelter’s websites present tabled data for a number of uses. Our Media team in England relies on tables to present the data behind the research and reports we release (example above). And our legal and advice sections both use tables to display information such as benefit rates.
How to create one
Use Add entry and select Component – Table
Name – this is the system name seen in Contentful
Header – use this field to add an H2 heading above your table (optional). If you need a heading smaller than H2, use the text editor in the page you’re building or add a Simple rich text block.
Table
To manually create your table: Use Add column to start. When your first column is added you’ll see the Add row button appear. Add as many rows and columns as you need and input your data into the cells. You can easily move or delete rows and columns.
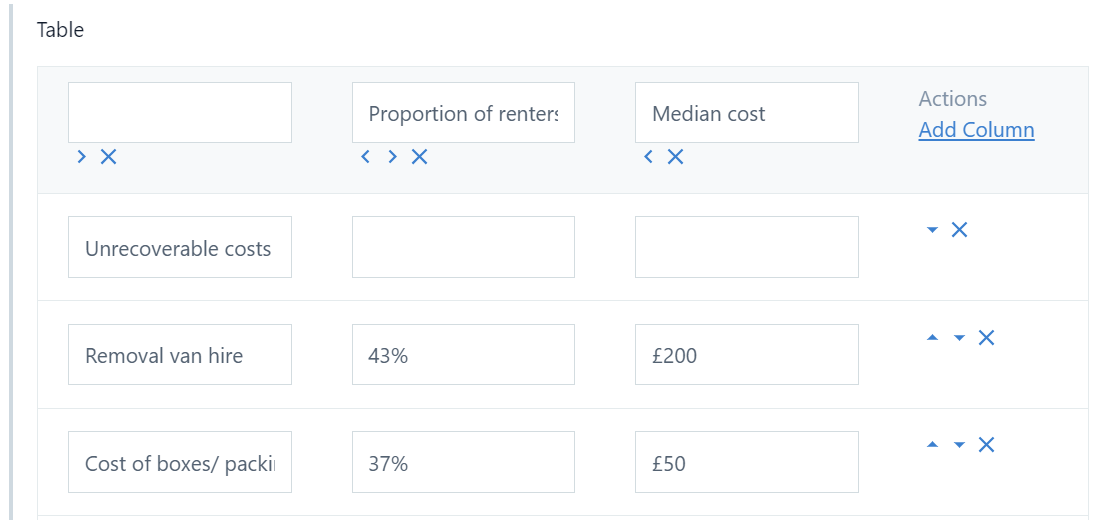
To upload your data to automatically create a table:
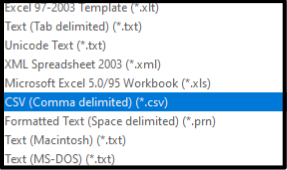
Make sure your data is saved in Excel as a CSV file
Use Choose file to find your CSV file
Click Import file – before Contentful imports your data, it will show you a sample of how it will display. You’ll see two tick boxes pre-ticked.
If you want the file's header to overwrite the first row in the table you’ve created, leave both boxes ticked (left image below)
If you want the first row you've created to overwrite the header in the file, un-tick the second box (middle image below)
If you want your created first row to display as the header with the file's header as a row below it, un-tick both boxes (right image below)
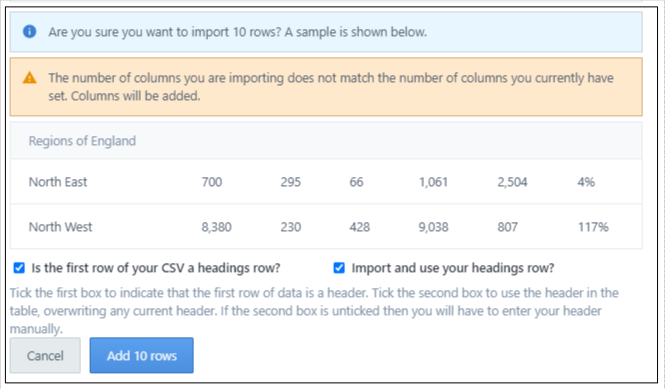
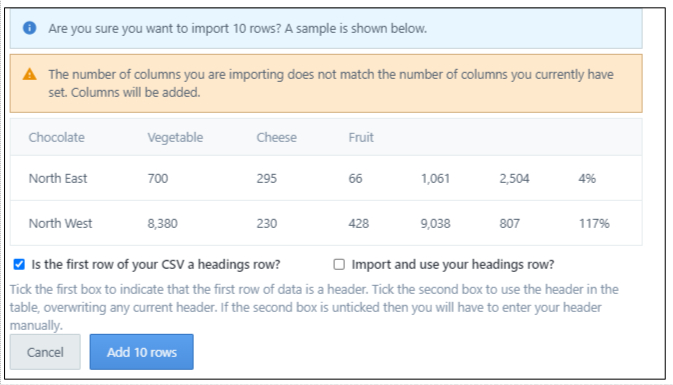
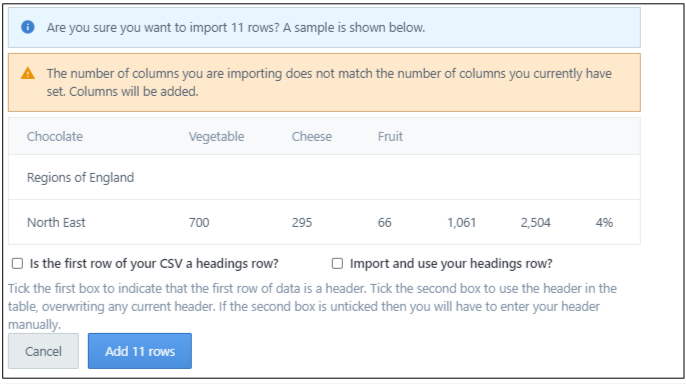
4. Click Add XX rows – your data will be in the table now. The table builder’s cells are small, but the data will display fine once you add the table to a page and preview it.
Publish your table. Add it to a page by using the Embed button in the page’s rich text editor, then choose Entry to find and add your table.
Style notes:
Try to avoid more than 8 or 9 columns, otherwise the table will display with a horizontal scroll bar, which isn't the nicest user experience
Try to avoid having an empty cell in a column of the top row. In this example, ‘Regions of England’ is basically just a column header, so move it into the top cell in the first column:
Any questions? Email Lindsay Foley in the Central Digital team.
