Creating your content
There are two ways to create new content in Contentful: Using Add entry from the main content dashboard; and using the Create new entry and link options within any content you’re building or editing. So be careful – you can quickly add a lot of content to the system, including duplicate entries.
Before you create anything new, your mantra should be “Do we already have it?”
The Add entry method
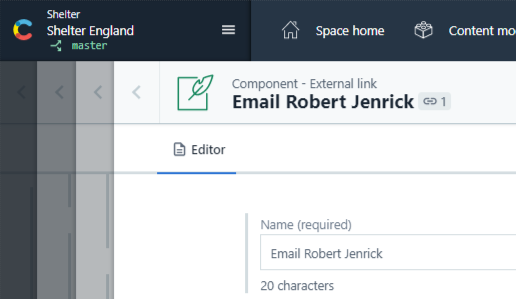
Start with Add entry upper right on the dashboard. If your content type dropdown above the main content list is set to a specific type, Add entry will give you that type as your first option. Otherwise scroll to find the type you want to create. TIP: type the first 3 letters of what you need in the search box - it filters quickly.
Click on the content type to create your entry. The next screen you’ll see will be the entry editor for that type. At that point, you’ve created content without entering a single field. If you come out of the entry (use the left-facing arrow, upper left), you’ll see your new content atop the main list.
Instant content:
Upside: it’s incredibly easy to add new content to the system. Downside: you can quickly accumulate a lot of junk content and false starts. So make sure to immediately delete any entries you didn’t mean to create or that you won’t use later for publishing, drafting, training or testing.
In the entry editor, complete the various fields for that content. (See the menu on the Using Contentful page for guidance on each content type). Anything you type or click will be auto-saved.
The Create new entry and link method
When you’re editing a piece of content and you’re given the option to either Create new content or Add existing content, choose wisely. Unless you’re certain that the content you need doesn’t exist, you should always start with linking existing content.
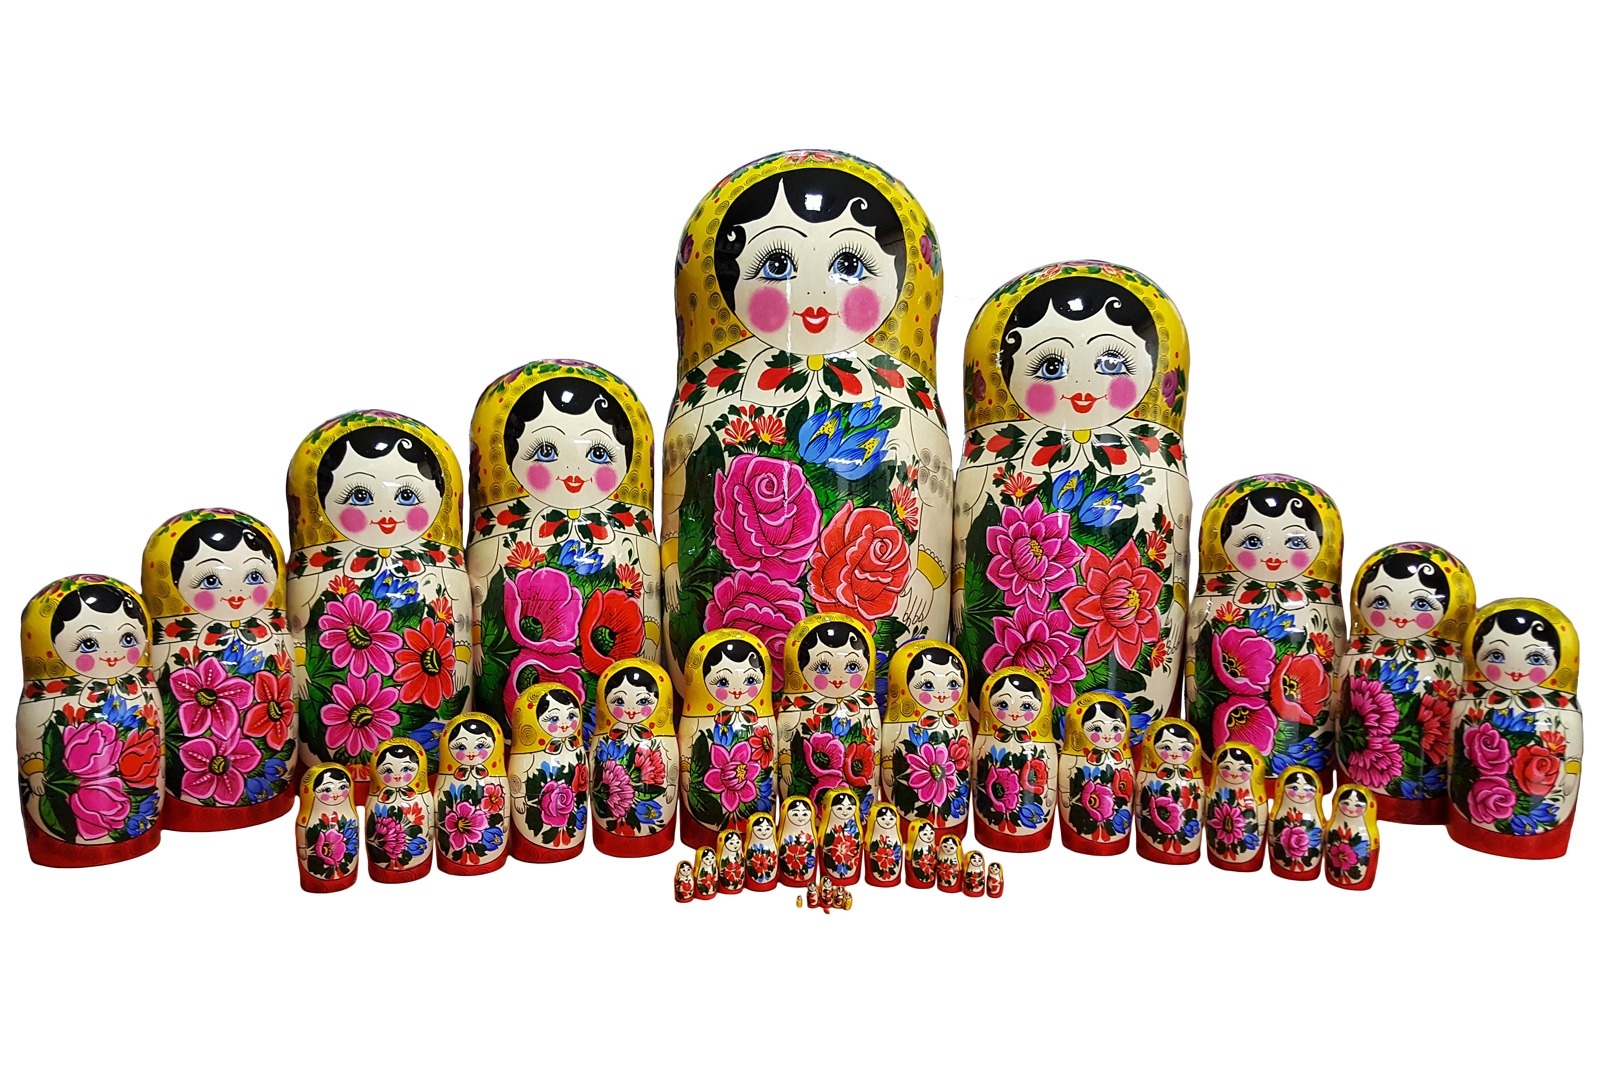
Navigating the Russian dolls
Whenever you’re within a content entry and you click to edit other content within that entry (for example, a CTA assembly in a content page), that entry will open as an overlay.
If you then click into any content within that entry, it will also open as an overlay. And so on.
Focus on the name of the content type you’re editing and you’ll be fine.
When you publish something, if it has nested content that isn’t published, you’ll be notified and asked if you want to go ahead and publish. You can go into that draft item, complete any missing fields and publish it, then go back to your original item.
If you haven’t added metadata, etc., or haven’t completed a required field, Contentful will let you know.

Editing the content fields
Content naming tips
Contentful’s search is one of its strengths. Whether you’re looking for content in the main dashboard or within the flow of building a page, the search tool gives you dropdowns and filters. However, you can play a part in keeping content findable by observing a few naming conventions:
Clearly describe the content itself or its purpose.
BAD: June 2019
GOOD: Debt advice newsletter 2019
Give it a name general enough so it could be reused in a range of ways, but not so general that it becomes unfindable.
BAD: Donation button
GOOD: Christmas appeal CTA button
Don’t include the content type in the name. The system will tell you what the type is.
BAD: How to get your deposit back callout
GOOD: How to get your deposit back
Generally speaking, the more granular/smaller the piece of content, the more generic the name can be. Individual components that are nested in larger assemblies and pages only need to clearly say their purpose, not where they're used. Some examples:
Vertical Rush FAQ - How much should I raise (accordion component)
Vertical Rush FAQs (accordion assembly)
Right to a secure home (standard hero)
Man running up a hill (full width image)
Partner with Shelter CTA (standard CTA)
Using the Rich text editor (RTE)
Many content types in Contentful include a rich text editor. You can format text and embed content such as images (and, depending on the component, other content such as videos, inline callouts, share blocks and more).
Pasting text
All pasted text from any source (websites, Word etc) must be stripped of any previous formatting*. The easiest way to do this is Ctrl + Shift + V.
Once you do, you’ll need to create P breaks before each paragraph or formatting change. When you paste imported text, it may appear to have paragraph breaks but don’t be fooled – it doesn’t. So you’ll need to:
Place your cursor right in front of the first character in the paragraph or line
Hit Backspace until the text is next to the previous text
Hit Enter or Return to create a proper P break
Formatting text
When creating the body copy for your component or page, the menu bar at the top of the rich text editor gives you all the formatting options including hyperlinks.
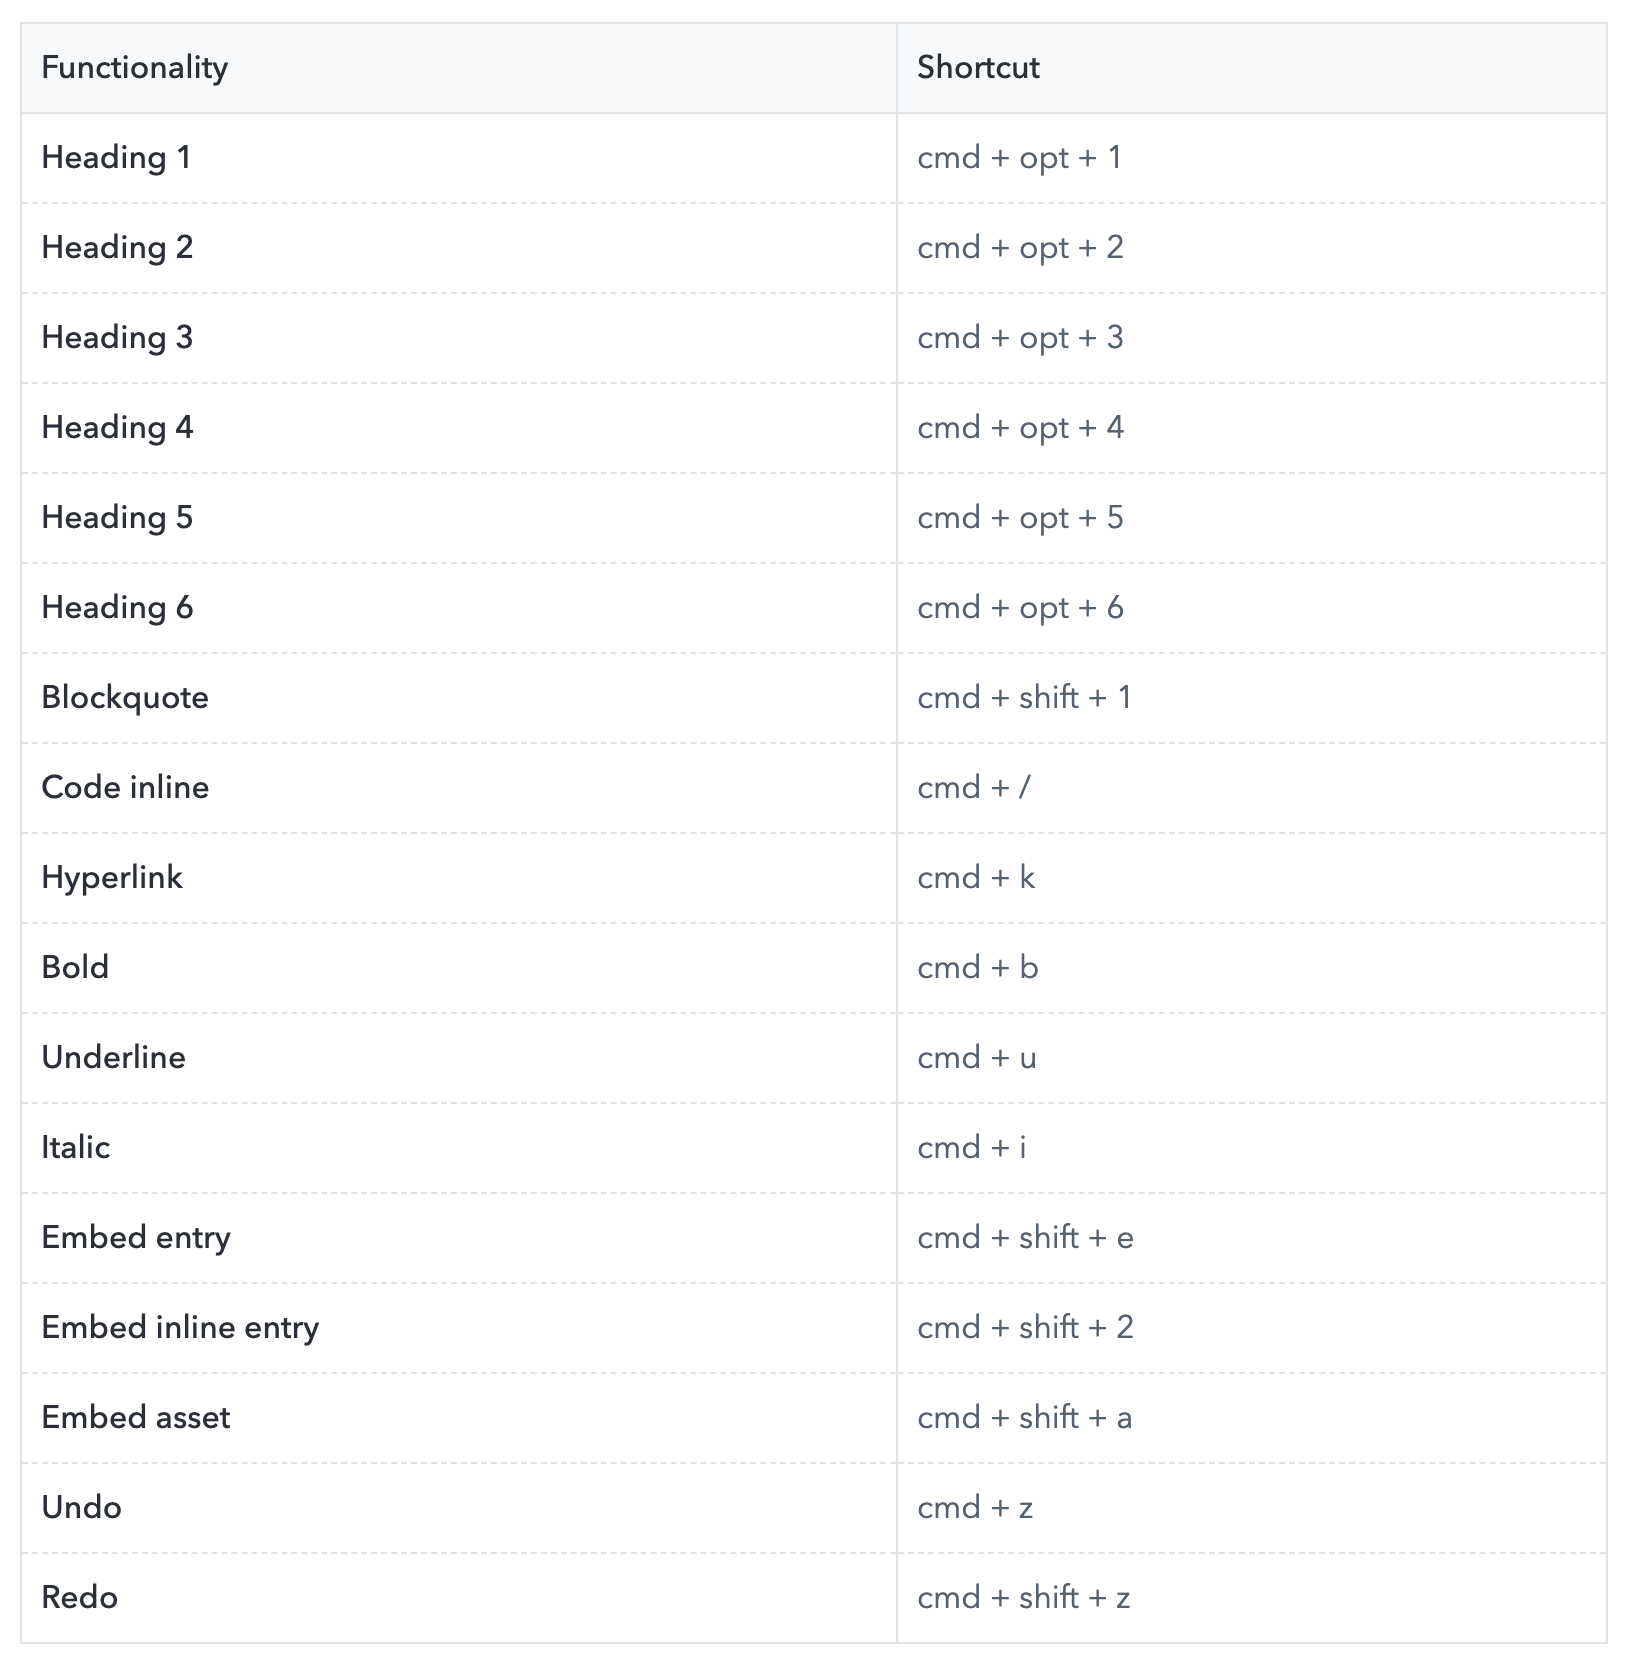
Keyboard shortcuts for the rich text editor:
Embedding content
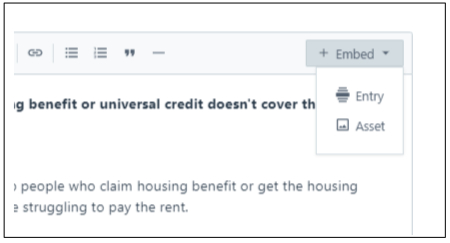
Contentful’s rich text editor allows you to embed content entries and media assets between paragraphs of text. However, it does not allow text wrapping.
Click Embed - depending which content type you’re editing, you can select Entry, and add content that fits what you’re editing (e.g., a table into a press release page). Select Asset to add an image from the Media library (see the guide to using the Media library).
To edit or remove embedded content, click the 3 dots on the block’s right edge. If you select Edit, that entry will open as an overlay.
Previewing your content
As you’re building content and pages, you’ll of course want to see how it will render for the user. The only content types we can preview in Contentful are page templates. Which means to see how any components or assemblies will look, you need to add them to a page and preview the page.
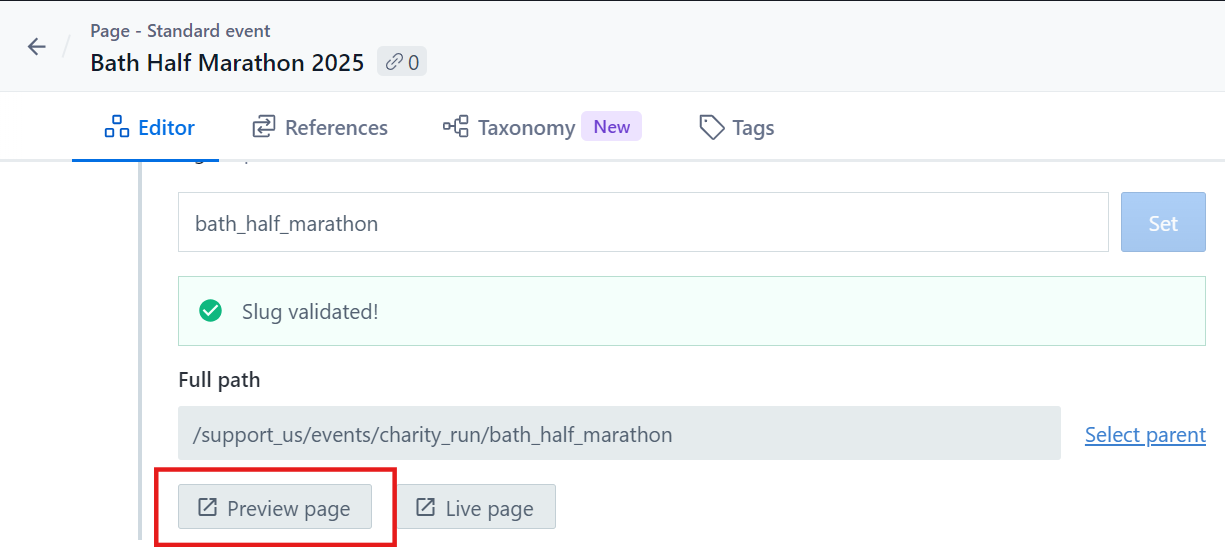
To preview a page, simply click ‘Preview’ under the full path field. You can use the Preview button at any time:
The platform behind our preview is called Gatsby, which updates the preview without having to publish.
(Note: If it’s being slow to display a page once you’ve clicked the button, be patient. If it’s not working at all, let the Central Digital developer team know as they may need to restart the preview function).
Publishing your content
For any content entry, the green Publish button always sits in the right sidebar.
Don’t be daunted by the word ‘Publish’ but don’t be careless either. Using it will only affect the live website if you’re publishing:
a page that’s been added to the URL hierarchy
content within a page that’s on the live site
For any other page or content, clicking Publish will simply ‘build’ the content to a state where it’s ready to go live if needed. For a page and its content to sit on the live website, the page first needs to be added to the URL hierarchy (more below).
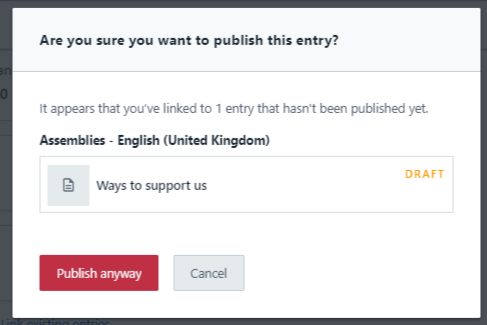
To publish a page, you should have published all content nested within it. If you attempt to publish a content entry containing other draft content, you’ll get a prompt.
The ‘tree’
Websites require hierarchies of pages for URL structures, breadcrumb navigation, and anywhere that section navigation is used (e.g. the left sidebars of Shelter Legal sections in Scotland and England).
The ‘tree’ URL hierarchy is a tool that allows us to create page hierarchies for our websites -parent/children/grandchildren relationships of pages.
It’s also how we enable pages to go live on the site. Before you publish a page, you’ll need to select the parent page from the URL hierarchy:

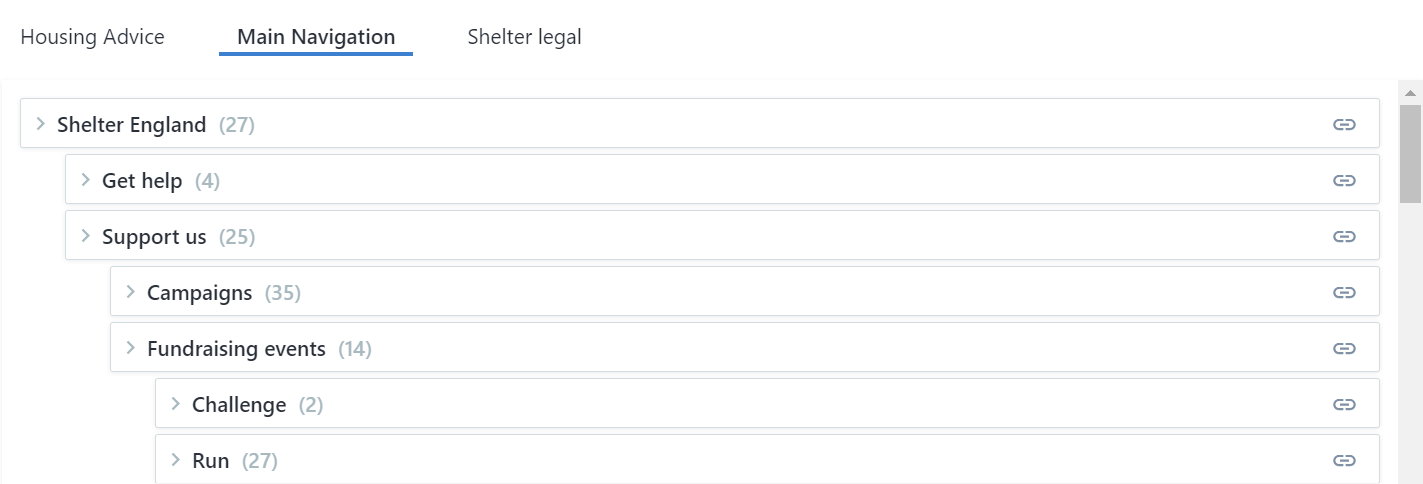
The ‘tree’ is a very powerful tool. And because it determines URL structures, it carries risks (moving a grandparent could break an entire section). Anyone can add new pages to the tree, but other changes can only be managed by designated admin users of Contentful.
Unpublishing
You can unpublish pages and content in two ways:
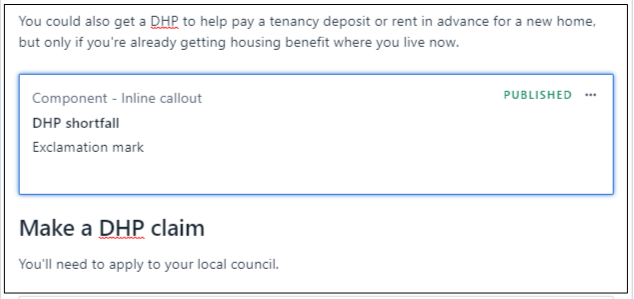
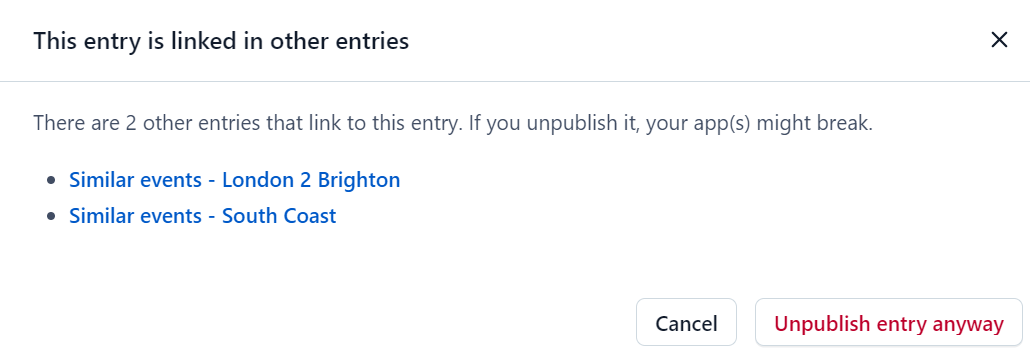
From within the content editor, by clicking the arrow in the green ‘Change status’ button and selecting Unpublish. This will prompt you if any other content is linked to it (left example below).
In the main content dashboard, by ticking the box next to an entry and clicking Unpublish. This won’t prompt you, it will just unpublish the content and return it to DRAFT status (right example below).

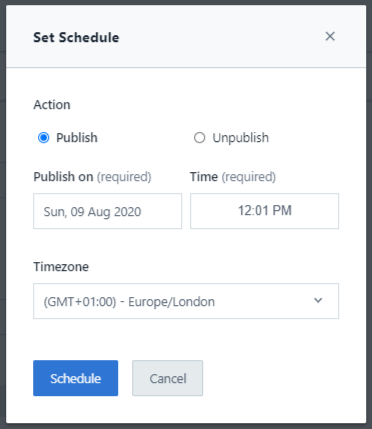
Scheduled publishing
You can easily schedule a publish or unpublish for any future date and time. You may need a press release to go live at midnight on a campaign launch date, or remove a page when an event is over.