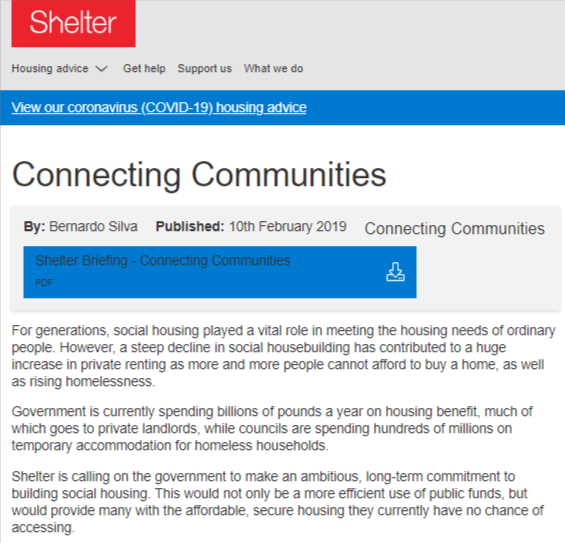
Policy page and Policy component

Shelter’s policy, research and good practice reports and briefings, which underpin so much of what we do, are kept in the Policy Library for each of the Scotland and England sites.
To build a policy library page, you create and publish two entries in this order:
Component - Policy
Page - Policy
Component - Policy
Start by using the Add entry dropdown, upper right in the main content dashboard.
TIP: Quickly filter the list by typing the first three letters of what you need, eg pol…Complete the fields:
Policy name
Author
Publish date
Display date
Summary - Displays in the policy page below the title and download block.
A. Write or paste your text into the rich text editor (RTE). To paste content scraped from another page or source, use Ctrl + Shift + V, which removes any previous formatting. Then add paragraph breaks before each change of formatting or new paragraph: place your cursor before the first character of a new paragraph, backspace to the last character of the previous paragraph and hit Enter.B. Format your text – you can only format the summary as normal but you can add hyperlinks to internal content on our site or to external URLs
Media - add your download. Either upload the PDF to Contentful’s Media library by clicking Create new asset and link or, if you’ve already uploaded the PDF, use Link existing asset to search for and add it. Learn more about uploading to Media.
When you’ve completed all fields, Publish the component.
Page - policy
To start, use the Add entry dropdown upper right to select Page - Policy.
Then complete your fields:
Title – this will generate the heading (H1) atop the page
Slug – this will be auto-generated when you complete the Title field. Set the slug – The CMS will take a couple of seconds to validate the slug, which is the final part of the URL.
NOTE: Once your slug is set and your page published, do not change it. A page’s URL is the address the entire web knows it by. To change it invites mayhem.Select parent – Once you have a hierarchy in the Navigation component (aka ‘the tree’), you assign your page to its parent, which will update the Full path field.
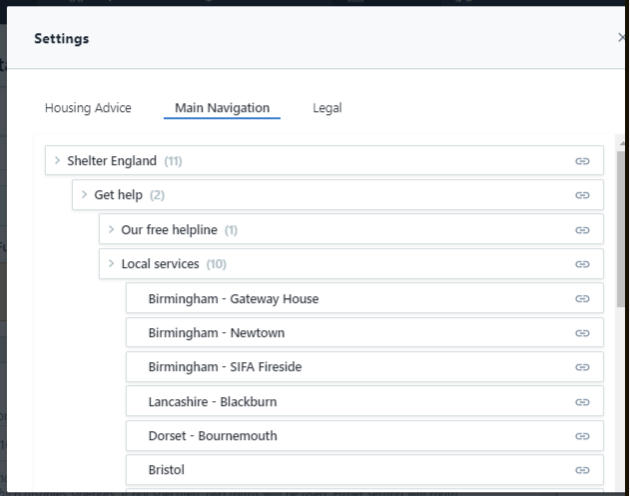
Click Select parent
In the new window, click Main navigation, then open Professionals (example below is just for demo purposes). Click the link icon on the right edge of Policy library. The window will close and in your page the Full path field will update.

4. Policy – Click Link existing entries to find and add the policy component you’ve created. Or if you haven’t created it yet, click Create new Component - Policy and link and follow the steps above.
5. Page information - This is your page metadata, which drives organic search and social traffic. Read our guide to the metadata component.
6. Assemblies - you can link to an existing (or create a new) share block component or a CTA assembly if you want to build further engagement into your page
7. To see your page, click Preview and when you’re ready, Publish it.
Any questions? Email Lindsay Foley in the Central Digital team.
