Video self-shooting, a practical guide
Shelter’s guide to self-shooting a video, taking you through the filming process with practical tips and techniques.
At Shelter we use video as a powerful tool to share stories, highlight housing injustice and campaign for change. Some of our most impactful content has been self-shot by the people we work with, or staff, who don't have prior filmmaking experience.
This introductory guide covers the filming process and some practical self-shooting techniques to help you get started.
Filming
Whether you are recording a video diary or making a documentary, the process of filming can be broken down into two parts: the main shot and b-roll.
The main shot is the central footage and dialogue that tells the story, such as an interview, or piece-to-camera (when a subject or presenter speaks directly to viewers through the camera). It often consists of one or more people discussing a topic or telling their story.
The b-roll footage is supplemental footage, intercut with the main shot, that helps tell the story visually.
Informed consent
If you're filming an individual or group of people, be extra sure they have a full understanding of what it is you’d like to capture, what you plan to cover in the interview, and how and where the footage will be shown and for what purpose (as part of a fundraising campaign, or to lobby the government on a cause).
If you are recording a video diary, it is the producer’s responsibility to cover all of these things. If there is anything you are unsure of, no matter how small, ask for clarification.
Everyone who appears on film must have read and completed a media release form.
Main shot
The main shot is either an interview or piece-to-camera.
It’s usually advisable to film your subject, or yourself, sitting down. This way the subject is comfortable and able to concentrate more easily on what they're saying. It also means practically that your camera can be set-up in a stable position and won't need to move around.
Location
To film your interview or piece-to-camera, find somewhere well lit, quiet and free from interruption.
Larger rooms with a source of natural light are usually the easiest to work with, giving you more framing options and space to work in comfortably.

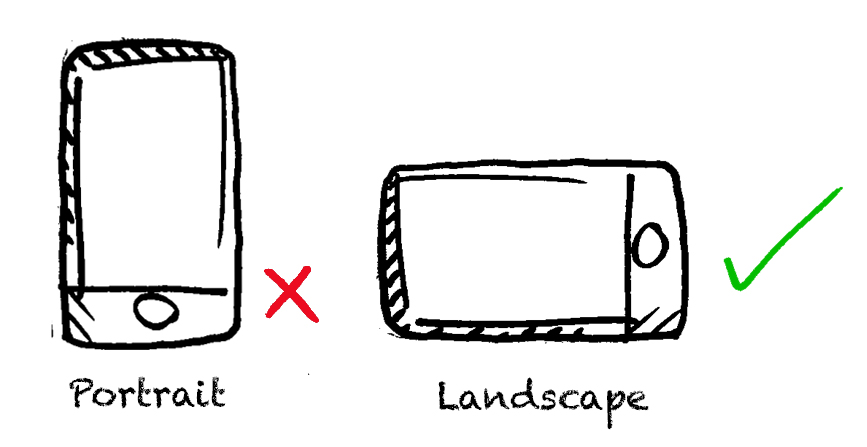
Shoot in landscape mode

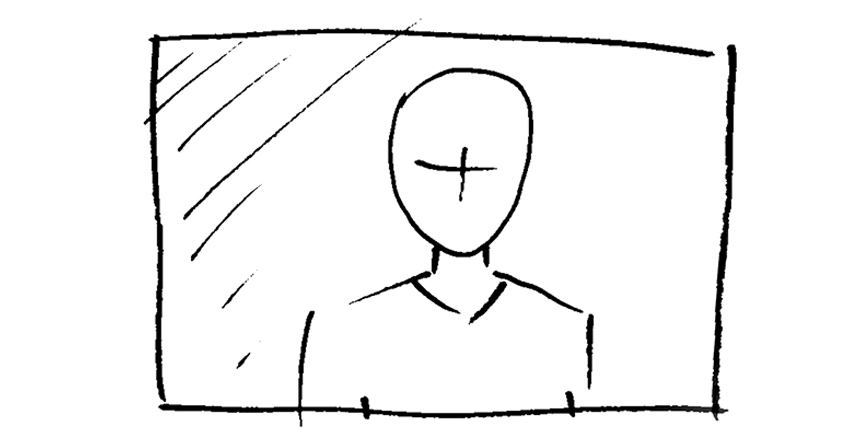
If you are shooting a piece-to-camera, position the camera at eye level and leave a comfortable amount of space around the subject in the frame.
Framing
If possible choose a non-distracting background
Stabilise your camera, either with a tripod or by positioning it on a chair or desk
Shoot in landscape mode
If your subject is looking off-camera it's usually best to position them to the left or right and in the left or right third
If your subject is looking into camera, it's usually best to position them in the centre of the frame
If filming yourself speaking, flip the screen so you can position yourself comfortably
Position the camera at eye level. Avoid angles where the camera lens is looking up or down at the person you're filming
Lighting
Make sure the interview subject is well lit
If you're speaking to camera, use the daylight from a window or position a lamp to light yourself
Focus
Your camera's focal point should be on the subject
If you have a camera with a short depth of field, ensure critical focus is on the subject's eye closest to the camera lens
Allow distance between your subject and the wall behind them, to give focal separation
Sound
Choose a quiet location with minimal background noise. Avoid filming near a busy road or in windy weather
If possible, use a lapel or handheld microphone
Record an audio ‘wild track’ at the end of filming. This is a sound recording of the location’s atmospheric noise which is used in the edit when cutting dialogue. 20-30 seconds is a good length
Conducting an interview
Ask your interviewee to include part of the question in the answer. E.g.
Q: “Please can you tell me where you live?”
A: “I live in Manchester” as opposed to simply “Manchester”Ask your subject to start and end answers with a second of silence. This will help them compose themselves and the pause will help in the edit.
In this video diary the filmmaker documents the difficult conditions he is living in over several days. He uses b-roll and visual devices to show his situation and he captures the atmosphere by recording sound and framing from his point of view.
B-roll
B-roll is the footage intercut with the main shot, used to tell the story visually. It’s what brings a story to life. For example, if you’re making a film about a Shelter Boutique manager, your main shot will be the interview footage of them talking about their work, and the b-roll could be shots of them walking through the shop, helping customers, styling the shop window and so on.
Whatever b-roll footage you choose to use, make sure each shot supports the narrative being driven by the main shot dialogue.
B-roll shooting tips:
During the interview, make a list of the topics discussed. With this list you can then capture b-roll footage of the things that visually tell the story
Try thinking non-literally when you are out capturing b-roll. Look for things in the environment that convey a feeling or describe the atmosphere
Ensure you come away with lots of b-roll coverage. A good rule of thumb is to shoot enough to cover four times the final interview length
Shoot something from a mix of distances, known as angles: wide (W), medium (M), or close-up (CU). This means that in the edit you'll be able to describe an action in a compelling and dynamic way
Hold shots still for 5-10 seconds
Don’t feel you need to move the camera unless it's important for the story
Camera movement should have intent and purpose - it should not float around or move aimlessly
Other video guides
Related
Read our other content guides
Read our brand guidelines
Contact us
Have a question or comment? Found a bug? Or maybe you’d like to contribute to the framework? Use our contact form to get in touch.
