
The event template is made up of both a page and a data entry, which contains basic information about the event such as date, location, distance, registration fee and fundraising pledge. For more information, see Event page and event data.
Changing event status
One of the most common changes required for events is to change the event status and call to action (CTA). To do this, you’ll need to make changes to both the Page – Standard event and the Data – Event. The available event statuses are:
|
Event status |
CTA |
|---|---|
|
Register interest |
Register interest |
|
Open |
Sign up |
|
Waiting list |
Join waiting list |
|
Closed |
Registration closed |
This step-by-step guidance covers how to set up each event status:
Register interest
Register interest is used when we want to promote an event, but don't want people to directly sign up yet. For example, we may still be unsure how many charity places we can offer.
When people complete the register interest form on the event page, your team will receive an email notification. You can then reach out to these interested people when event spaces become available.
-
Open the event page you want to edit in Contentful – see the Content Managers' guide for more information on how to do this.
-
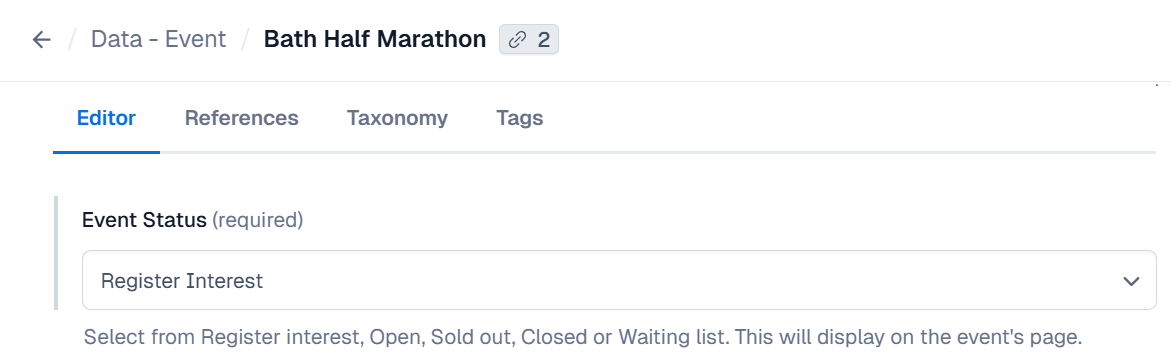
Click on Data – Event and scroll down to Event Status. Select Register Interest from the dropdown menu.
-
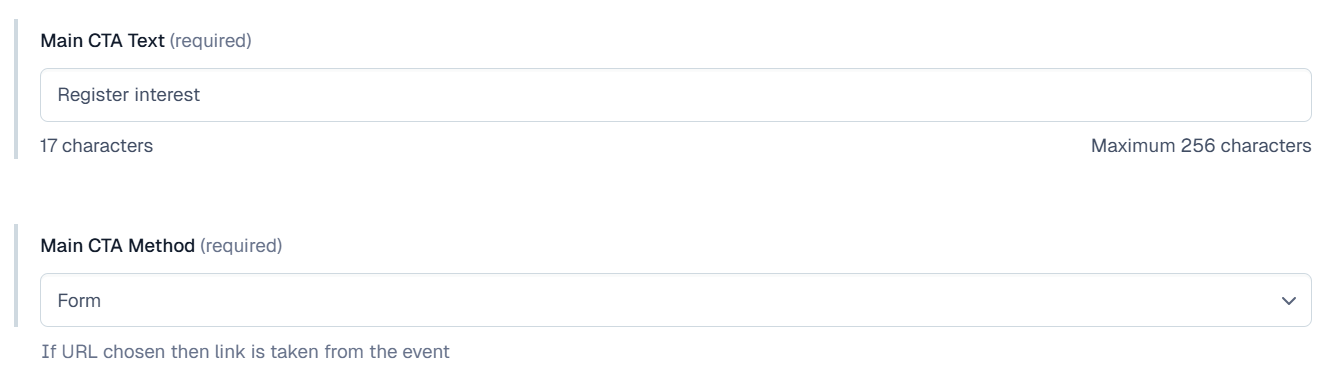
Go back to the event page. Change the Main CTA Text to Register interest (initial capital only). Make sure the Main CTA Method is set to Form.
-
Check if a register interest form already exists for this event. Scroll down to Register Interest Form and see if a form has been added previously. If so, you can just check all the details are still correct (be extra careful with dates). The existing form will automatically be added to the page because the event status is set to Register Interest.
-
If a register interest form doesn’t already exist, you need to create a new one:
-
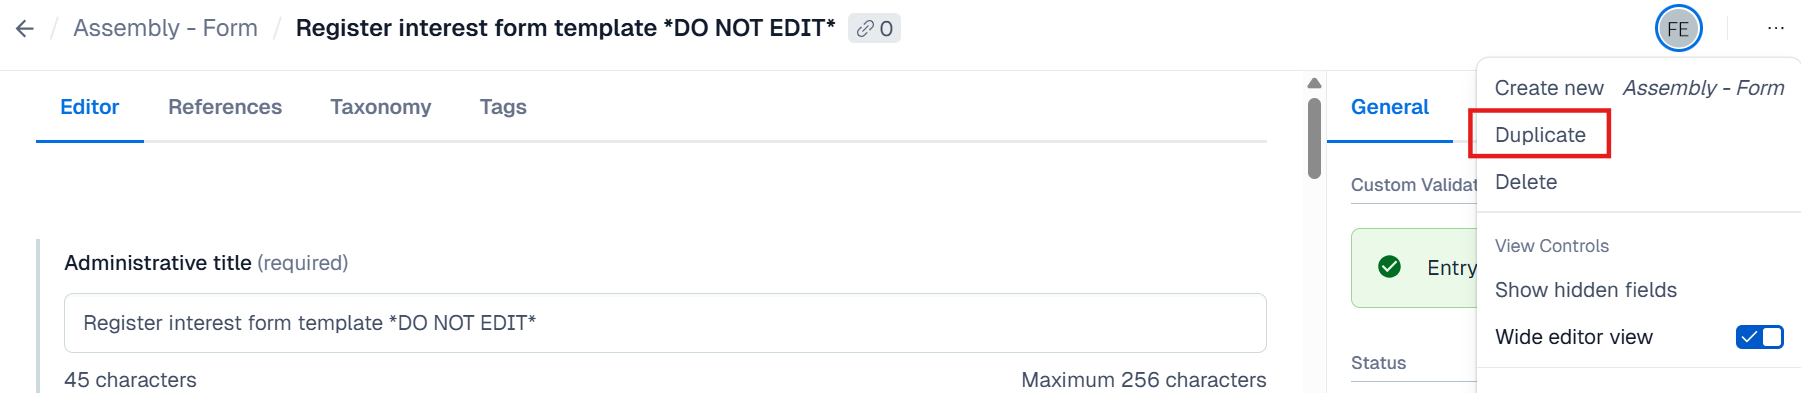
Open the register interest form template in a separate tab.
-
Click the three dots in the top right and select Duplicate.
-
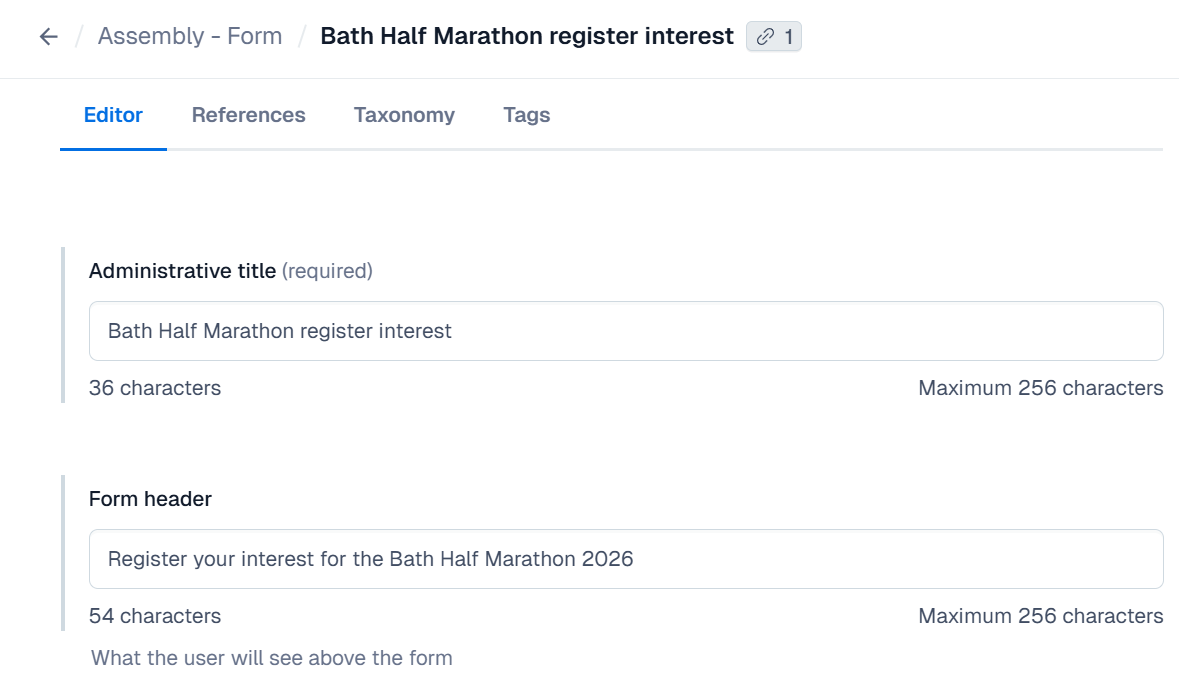
Rename the form with a sensible Administrative title e.g. ‘Bath Half Marathon register interest’, so you can easily find it in Contentful.
-
Update the Form header with your event name and year.
-
Update the Thank You message with your event name and year.
-
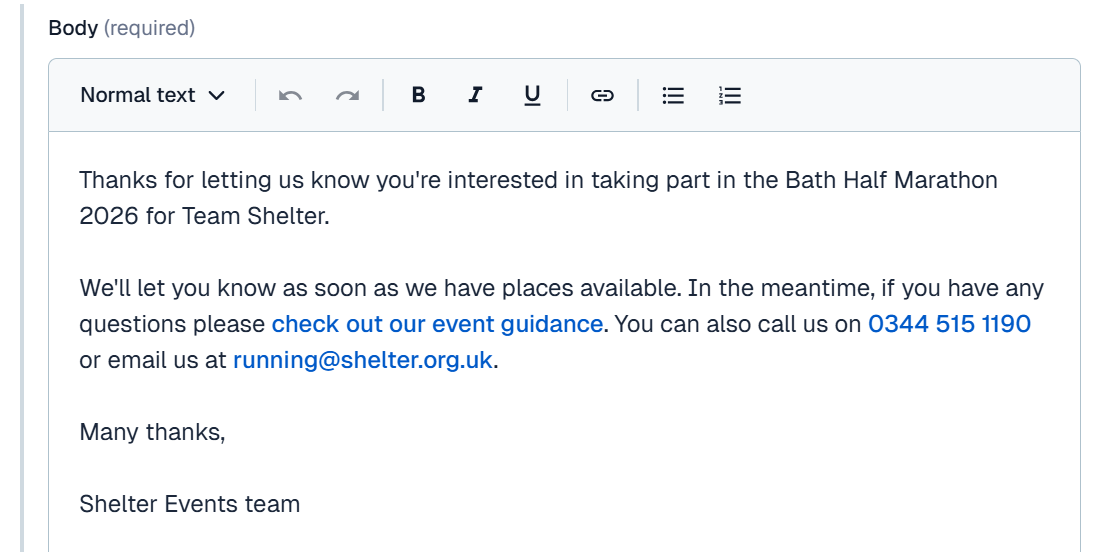
Thank you email contents: this is the email people will receive when they submit the form.
-
Under Thank you email contents click on the Register interest email template to open it.
-
Click the three dots in the top right and select Duplicate.
-
Rename the email with a sensible Administrative title e.g. ‘Register interest email Bath Half Marathon’, so you can easily find it in Contentful.
-
Update the Subject and Body with your event name and year.
-

-
Go back to the form. Now you need to replace the Register interest email template with the new email you just created.
-
Click the three dots at the top right of the Register interest email template and select Remove.
-
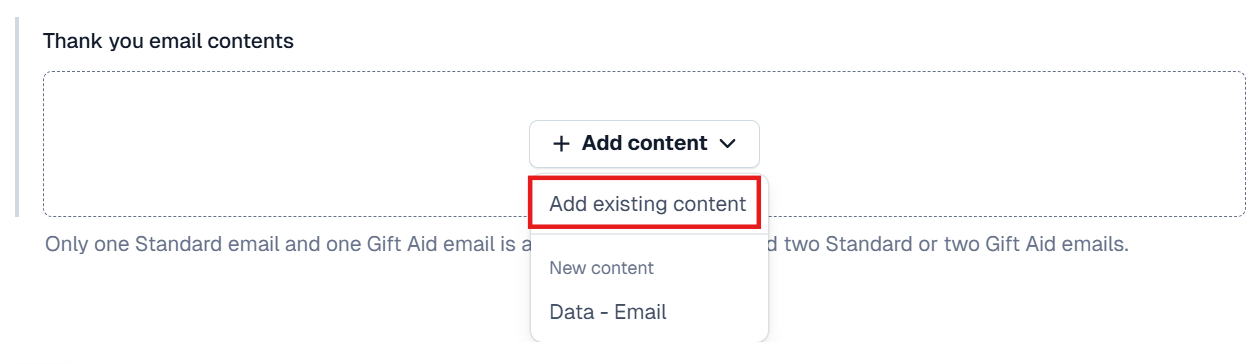
Under Thank you email contents click Add content and select Add existing content in the menu.
-
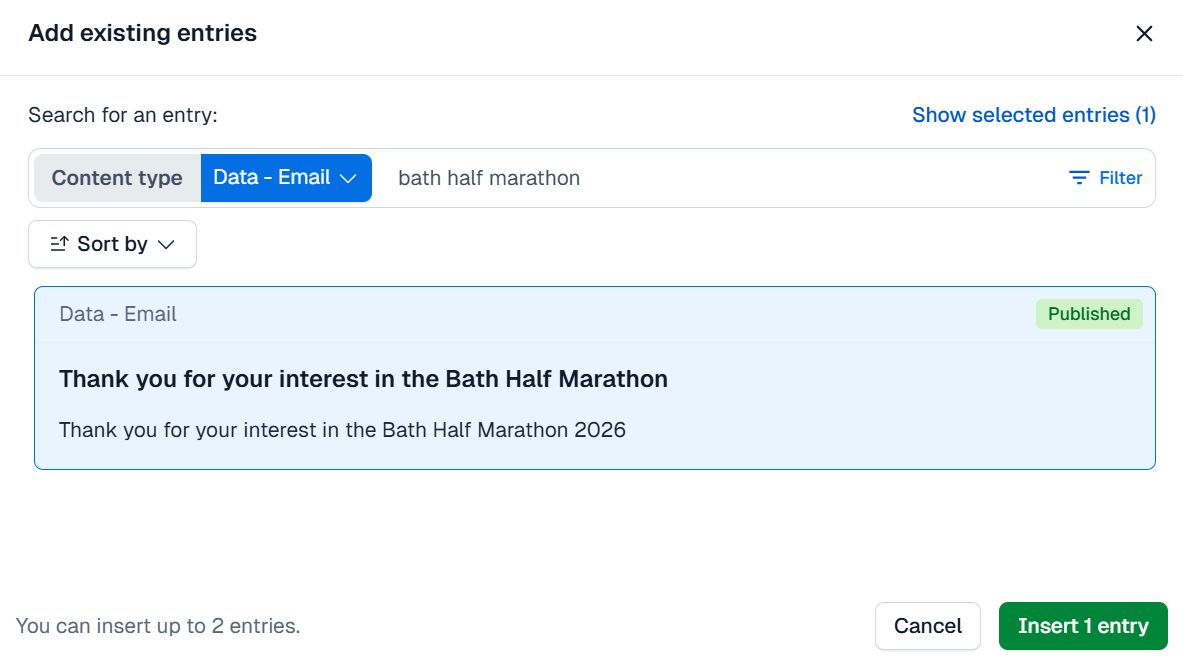
In the pop-up that appears, search for the title of your email and select it. Click Insert 1 entry.
-
All other form fields can remain the same.
-
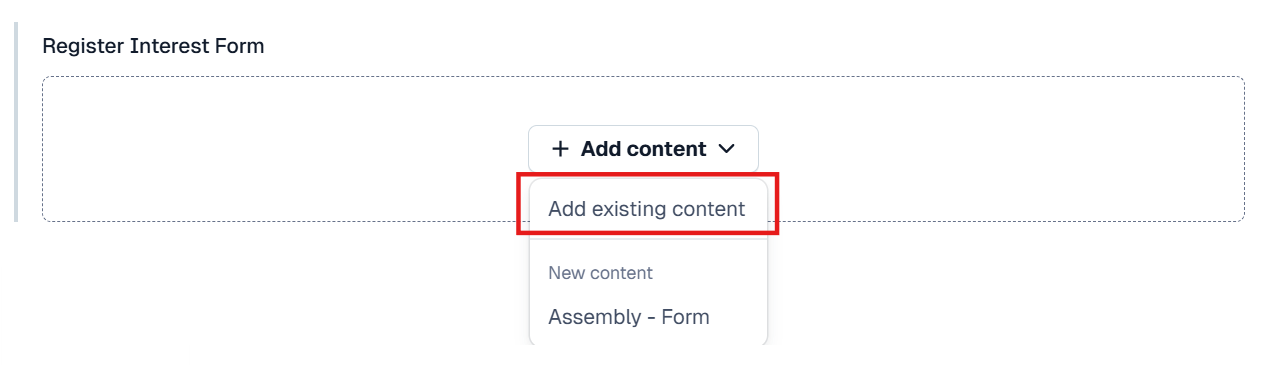
Return to the event page and add your new register interest form. Under Register Interest Form click Add content and select Add existing content in the menu.
-
In the pop-up that appears, search for the title of your form and select it.
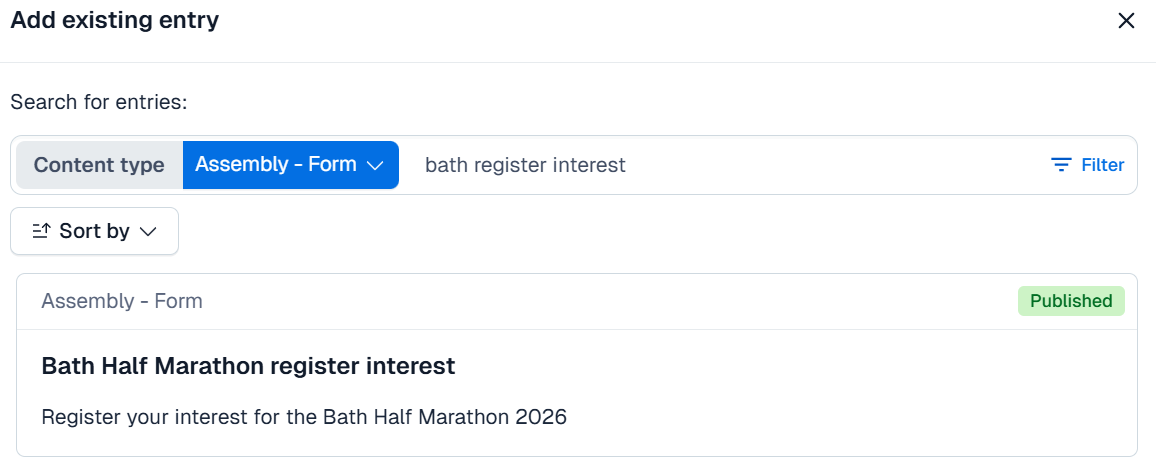
Your form will now be automatically added to the page, as the Register Interest event status has been selected.
Open
Before you open an event, an iRaiser payment page will need to be set up for participants to pay their registration fee. Please submit a Tier 1 request to the Income Generation Digital team.
The Open events status is used when an event is ready for people to sign up directly. This can be through an external link (e.g. to the event organiser website) or an iRaiser page where they pay the registration fee.
-
Open the event page you want to edit in Contentful – see the Content Managers' guide for more information on how to do this.
-
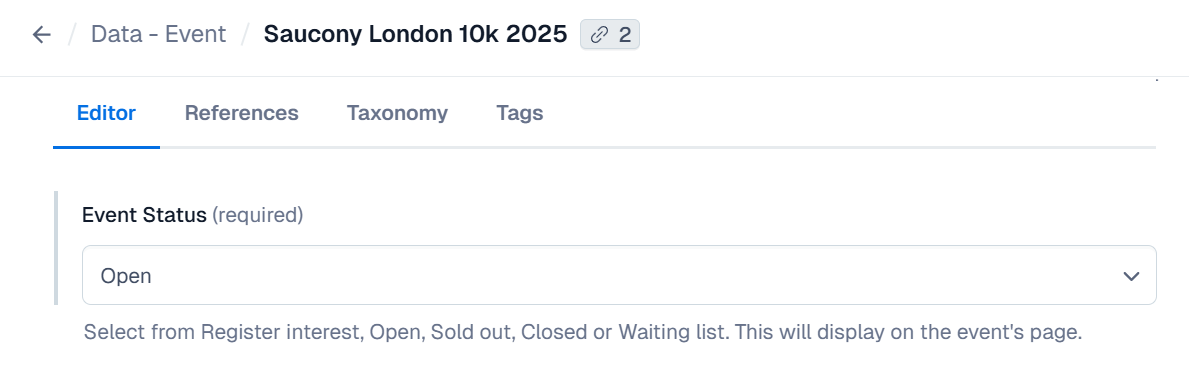
Click on Data – Event and scroll down to Event Status. Select Open from the dropdown menu.
-
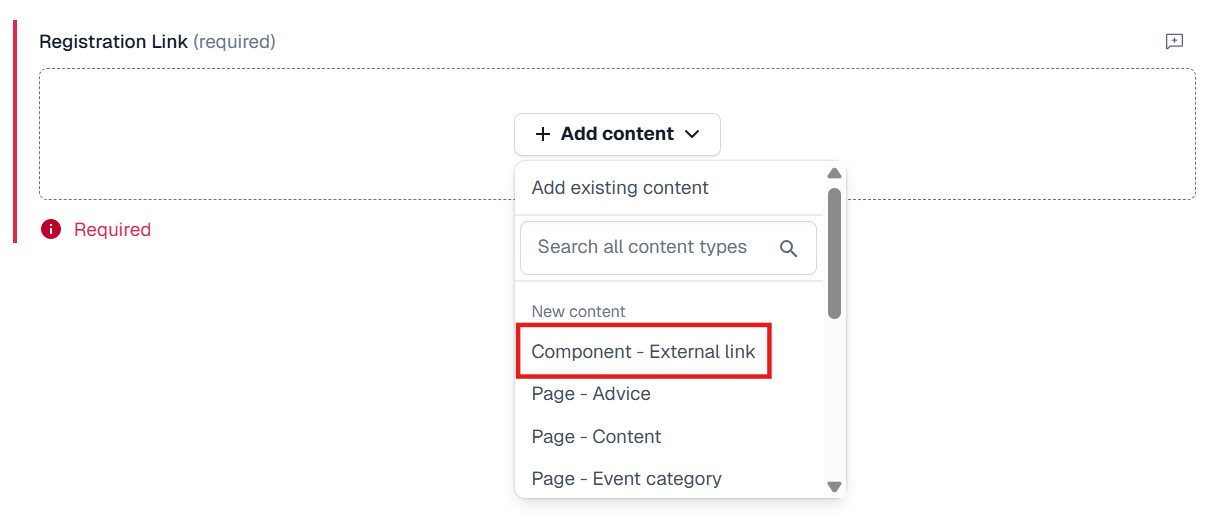
Scroll down to the bottom of Data – Event to Registration Link. Click Add content and select Component – External Link.
-
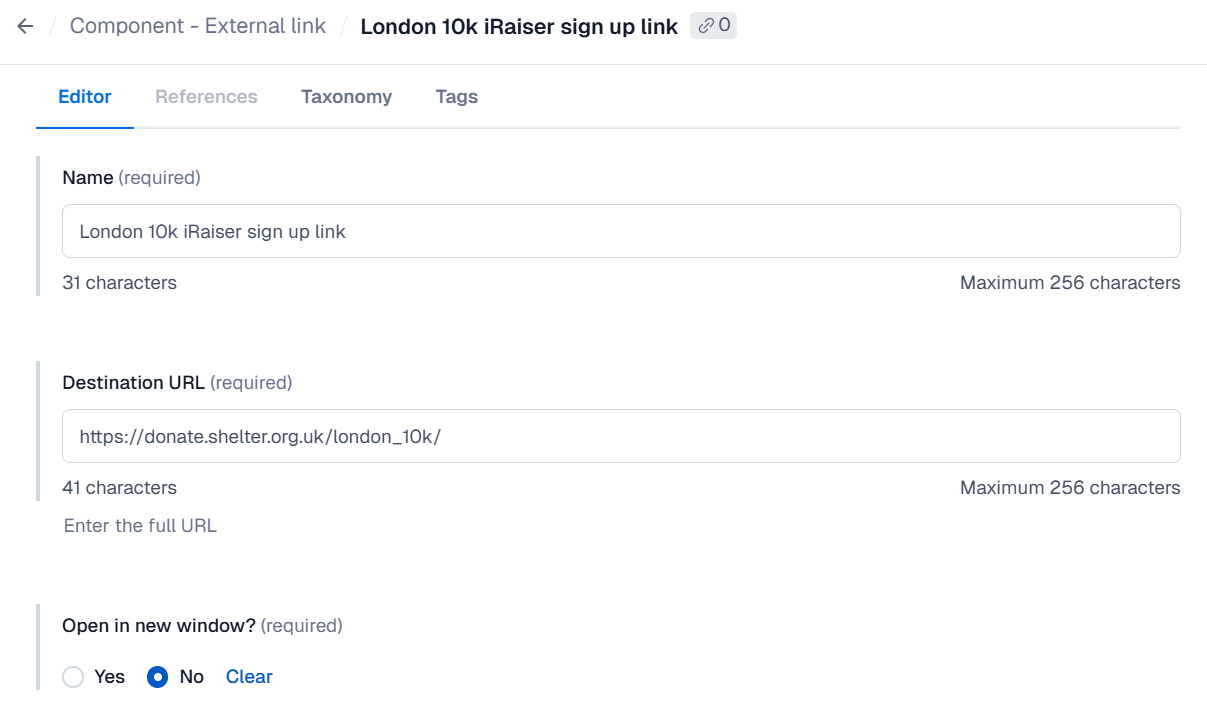
Complete the fields for the Component – External Link:
-
Name: this is the system name seen in Contentful.
-
Destination URL: this will be a link to the iRaiser page or external event organiser sign up.
-
Open in new window: select No as this is better for accessibility.
-
-
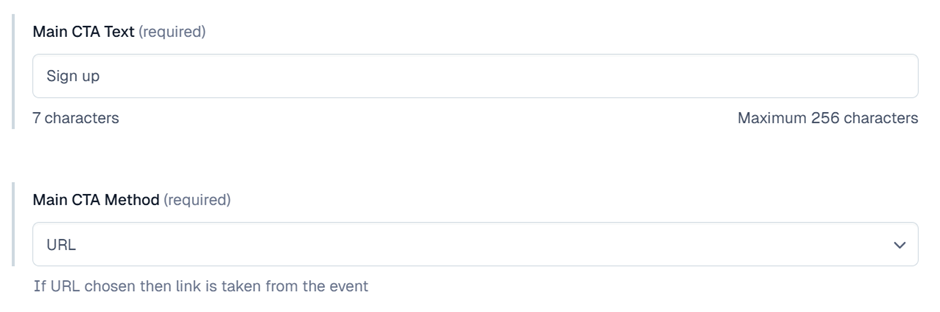
Go back to the event page. Change the Main CTA Text to Sign up (initial capital only). Make sure the Main CTA Method is set to URL.
Waiting list
Waiting list is used when an event is almost sold out, but we may have a few places remaining or dropouts.
When people complete the waiting list form on the event page, your team will receive an email notification. You can then reach out to these interested people if a place becomes available.
-
Open the event page you want to edit in Contentful – see the Content Managers' guide for more information on how to do this.
-
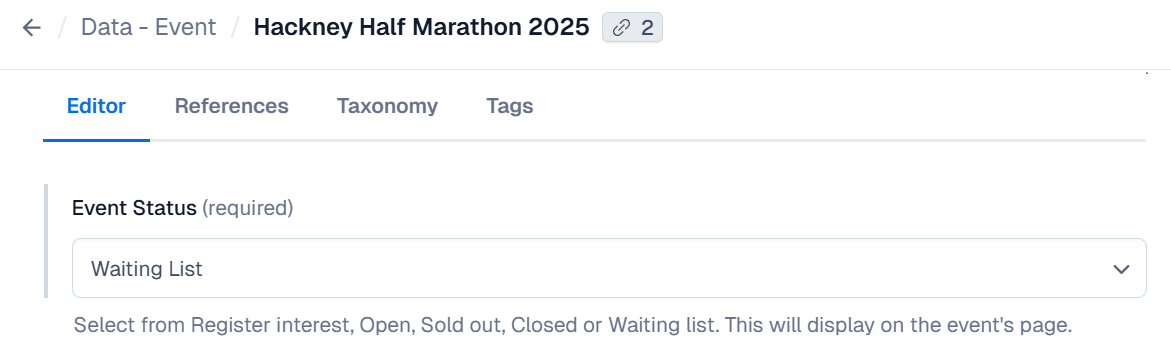
Click on Data – Event and scroll down to Event Status. Select Waiting List from the dropdown menu.
-
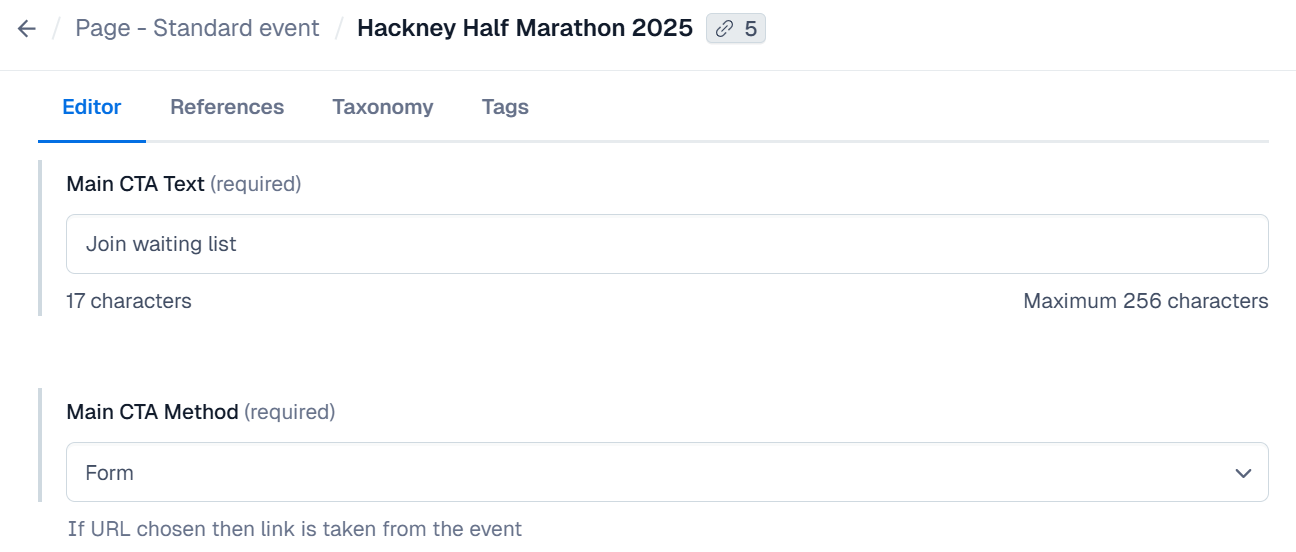
Go back to the event page. Change the Main CTA Text to Join waiting list (initial capital only). Make sure the Main CTA Method is set to Form.
-
In the Body Copy, add a notice that the event is now operating a waiting list:
-
Copy the following text to the top of the Body Copy, remembering to edit the event name and year:
Our team for the [Event name] [Year] is now full. But if you'd like to join the waiting list, please complete the form at the end of this page and we'll be in touch if a place becomes available.
-
Move the ‘Already have your own place?’ heading, text and CTA component below the paragraph you’ve just added. Even if places are almost sold out, we want to encourage participants who have their own place to sign up and fundraise for Shelter.
-
Check if a waiting list form already exists for this event. Scroll down to Waiting List Form and see if a form has been added previously. If so, you can just check all the details are still correct (be extra careful with dates). The existing form will automatically be added to the page because the event status is set to Waiting List.
-
If a waiting list form doesn’t already exist, you need to create a new one:
-
Open the waiting list form template in a separate tab.
-
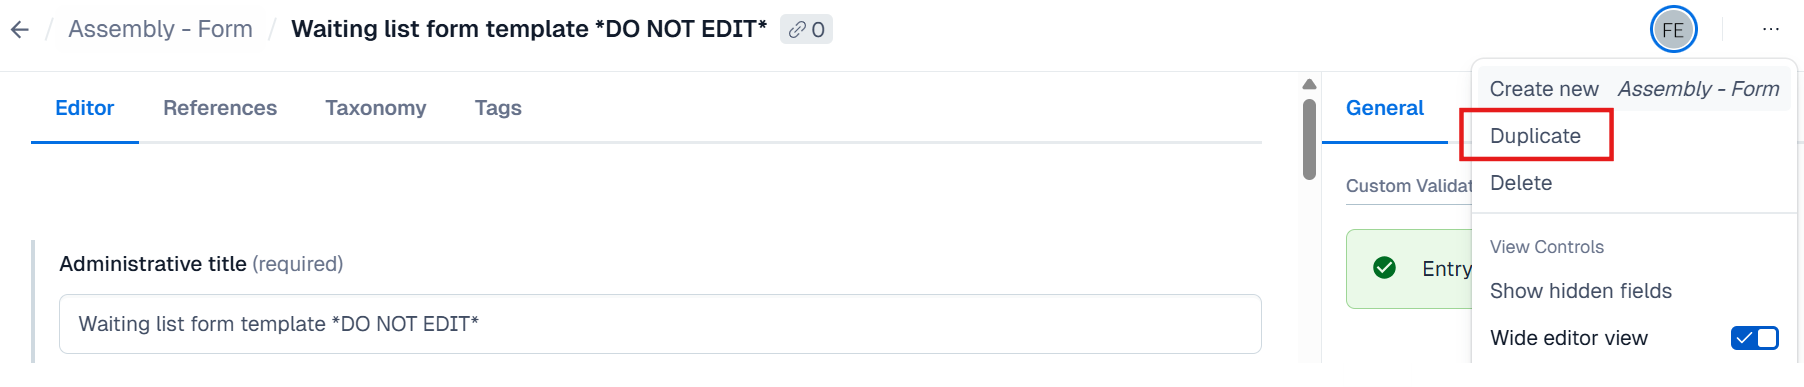
Click the three dots in the top right and select Duplicate.
-
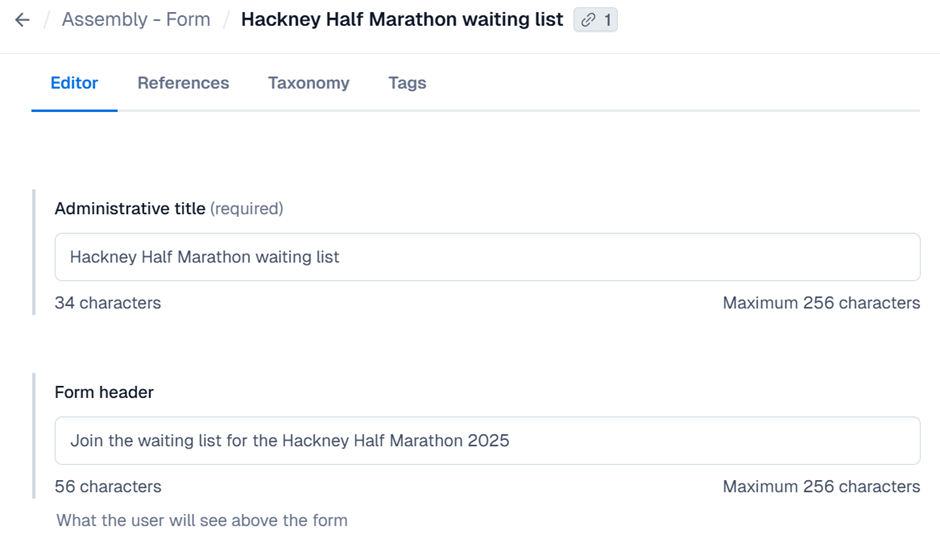
Rename the form with a sensible Administrative title e.g. ‘Hackney Half Marathon waiting list’, so you can easily find it in Contentful.
-
Update the Form header with your event name and year.
-
Update the Thank You message with your event name and year.
-
All other fields can remain the same.
-
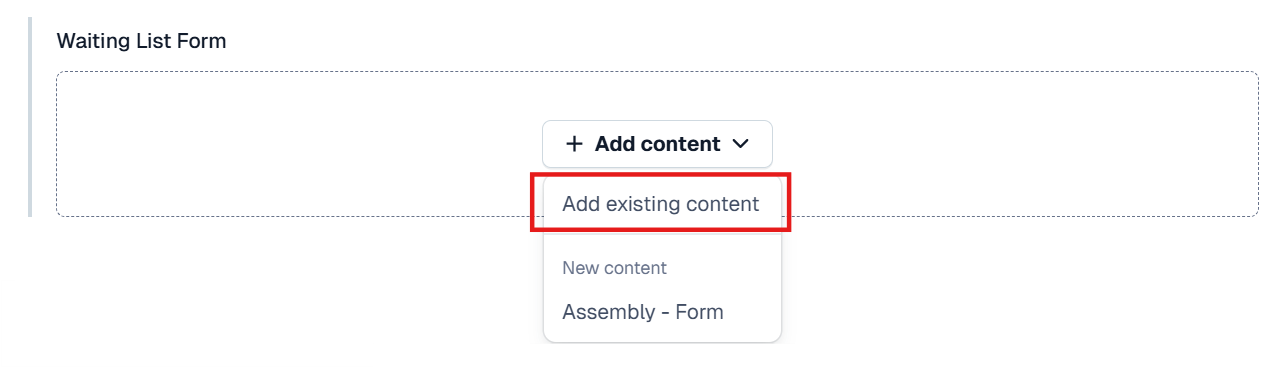
Return to the event page and add your new waiting list form. Under Waiting List Form click Add content and select Add existing content in the menu that appears.
-
In the pop-up that appears, search for the title of your form and select it.
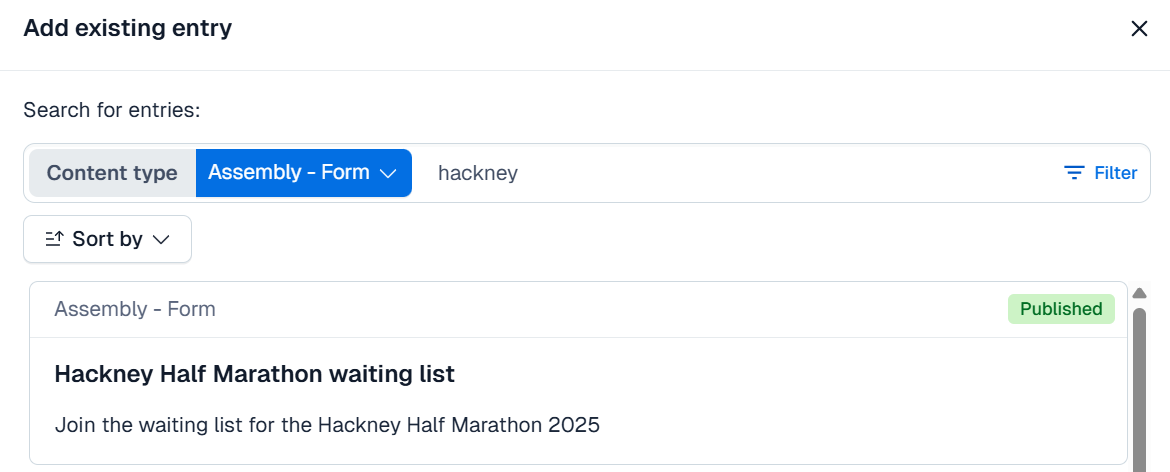
Your form will now be automatically added to the page, as the Waiting List event status has been selected.
Closed
After you close an event, the iRaiser payment page will also need to be closed. Please submit a Tier 1 request to the Income Generation Digital team.
The Closed event status is used when an event is sold out or closed for registrations.
-
Open the event page you want to edit in Contentful – see the Content Managers' guide for more information on how to do this.
-
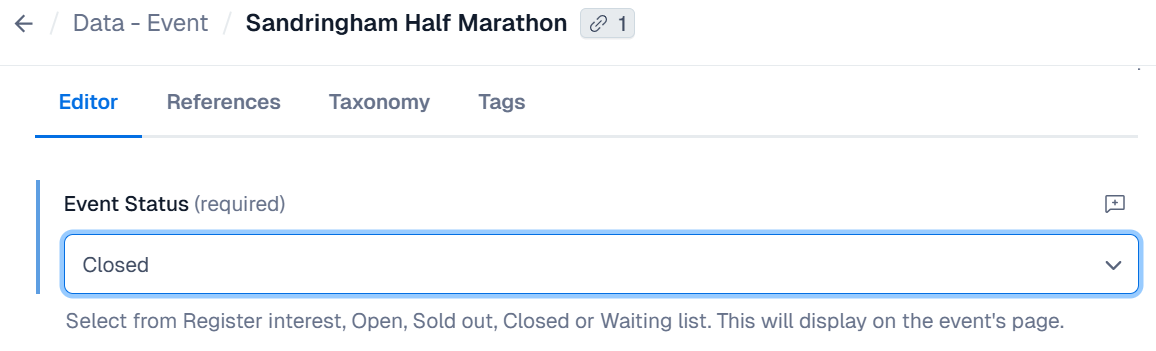
Click on Data – Event and scroll down to Event Status. Select Closed from the dropdown menu.
-
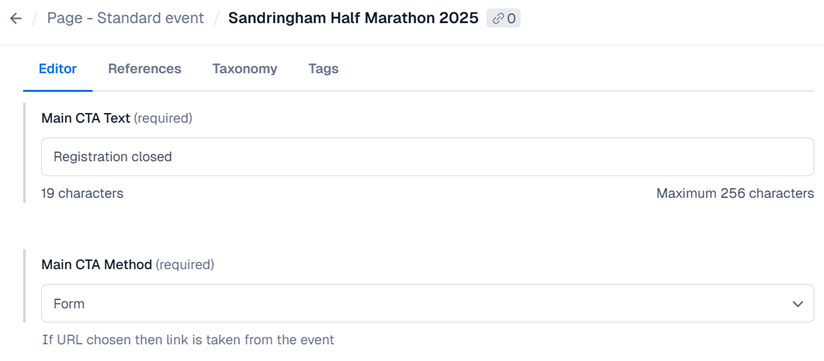
Go back to the event page. Change the Main CTA Text to Registration closed (initial capital only). Make sure the Main CTA Method is set to Form.
-
In the Body Copy, follow these steps to add a notice that the event is now closed for registrations:
-
Move the 'Already have your own place?' heading, text and CTA component to the top of the Body Copy.
-
Edit the text below the 'Already have your own place?' heading so it reads:
-
We've now sold out of [Event name] places. But if you were lucky enough to secure your own spot, you can still join Team Shelter and use your place to fight the housing emergency.
We'd love for you to join the team – please get in touch.
Updating events for the following year
Remember to submit a Tier 1 request to the Income Generation Digital team when your event needs to be updated for the following year (e.g. London 10k 2025 to London 10k 2026). They will refresh the copy and images and check the event is performing well in terms of SEO. Please provide as much notice as possible.