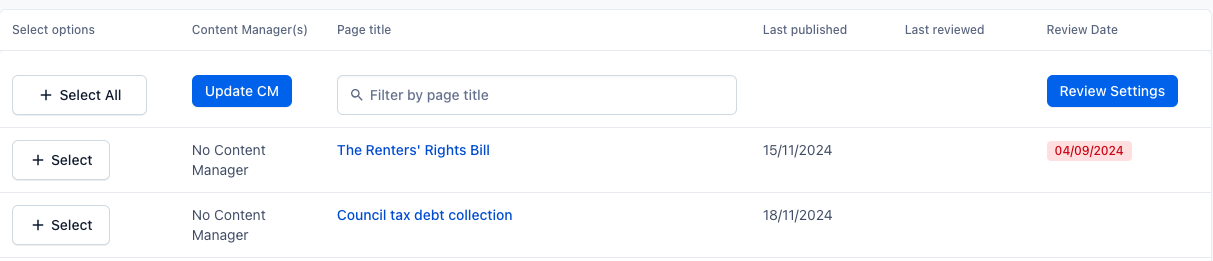
The content tracker has two main purposes:
-
to track which content on the Shelter websites is ‘owned’ by which content manager and team
-
to set a review schedule for each piece of content
To find the content tracker in Contentful
-
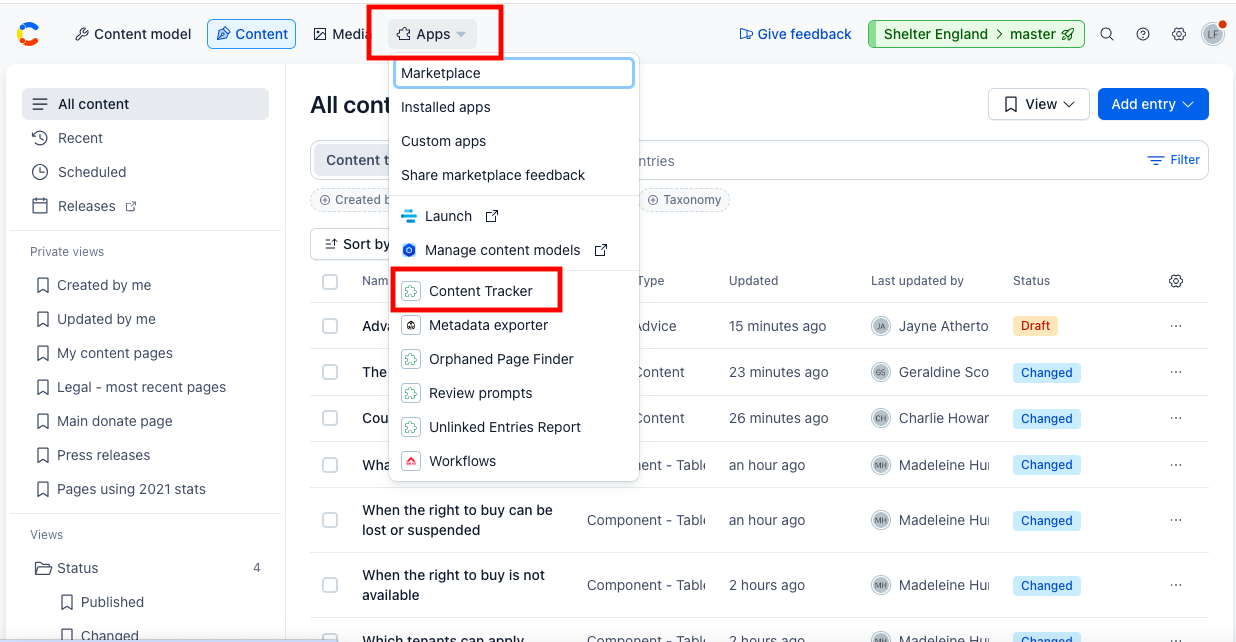
From anywhere in Contentful, choose the Apps dropdown in the top navigation menu.
-
Click ‘Content tracker’ to open the dashboard, which will allow you to perform any of the following tasks.
Seeing who the content manager is for each page
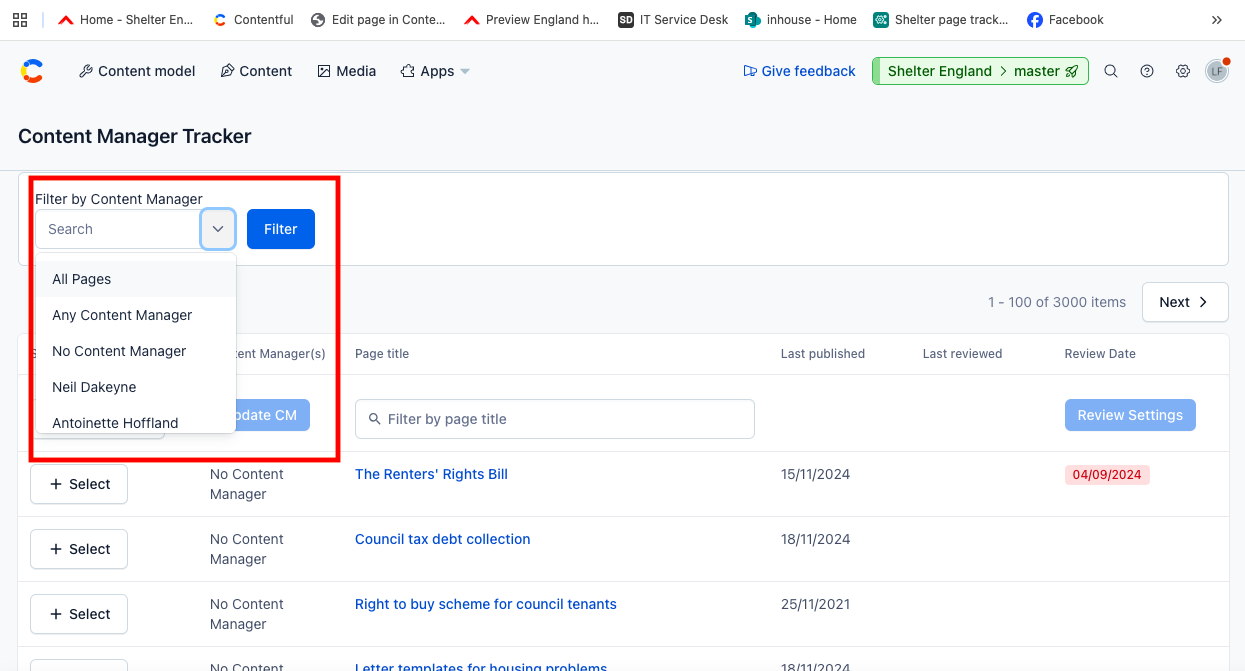
You can use the ‘Filter by content manager’ field to see:
-
content owned by an individual content manager
-
which content has no content manager assigned
-
all pages (this is the default result, but there is an option in the dropdown to revert to this view)
-
which content is assigned to which team – TBC, this feature is still in development Nov 24
To assign a new content manager to a page
When the dashboard first opens, you will see a list of all pages that have been published on the website. Draft and archived content will not be visible.
-
Use the ‘Filter page by title’ field to find the page you want to add a content manager for. Usually the name of the page will be the best search term to use.
-
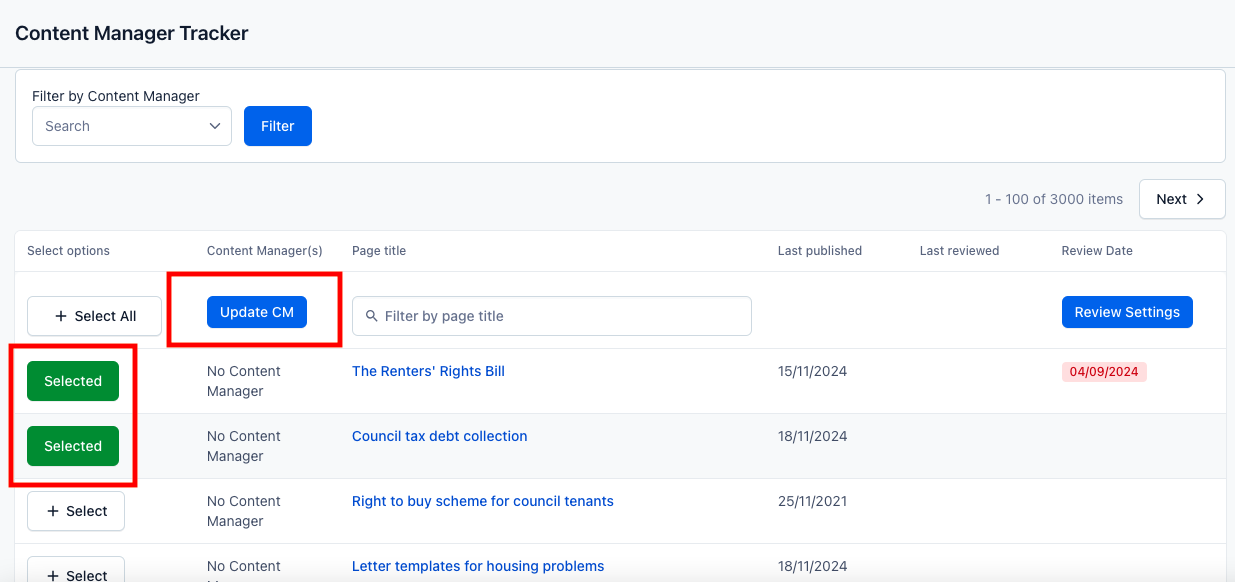
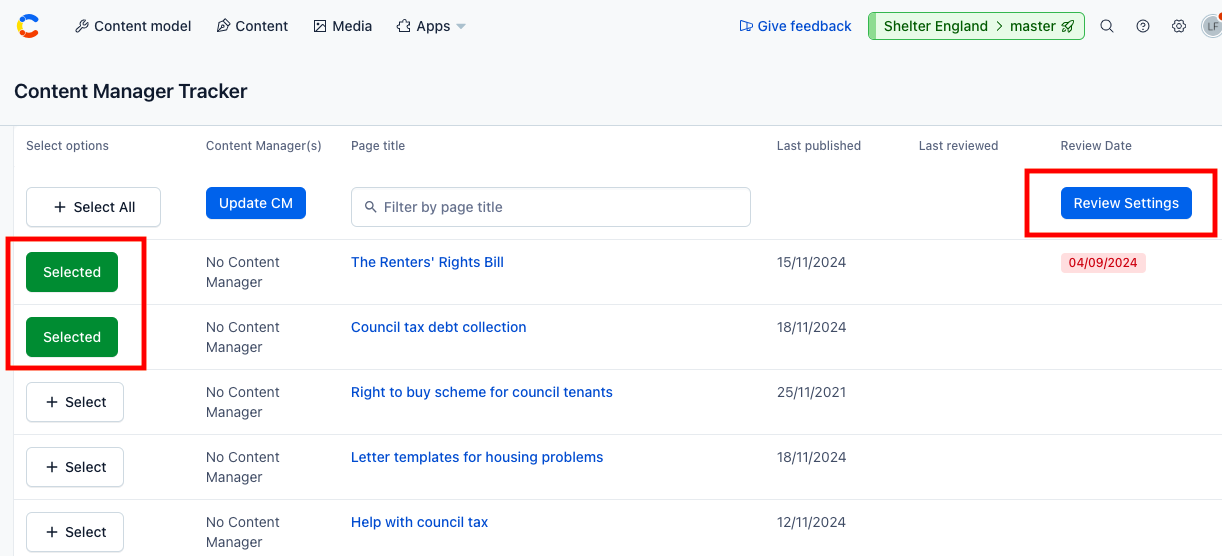
Once you’ve found your page, click ‘Select’ on the left side of the entry. You can select multiple entries to make bulk changes in the same way, and the ‘Select’ button will go green to show which entries have been selected.
-
With your page(s) selected, click the ‘Update CM’ button at the top of the second column.
-
Now choose the content manager you want to add. You can select multiple content managers if you need to. If the person you want to make a content manager is not on the list of options, they will need to have a Contentful account created for them, which can be done by contacting lindsay_foley@shelter.org.uk
You can also assign pages a content manager directly within the page entry editor itself, but you will need to use the content tracker to bulk assign pages.
To set a review schedule for a page
-
Use the ‘Filter page by title’ field to find the page you want to add a review schedule for. Usually the name of the page will be the best search term to use.
-
Once you’ve found your page, click ‘Select’ on the left side of the entry. You can select multiple entries to make bulk changes to in the same way, and the ‘Select’ button will go green to show which entries have been selected.
-
With your page(s) selected, click the ‘Review settings’ button at the top of the review column.
-
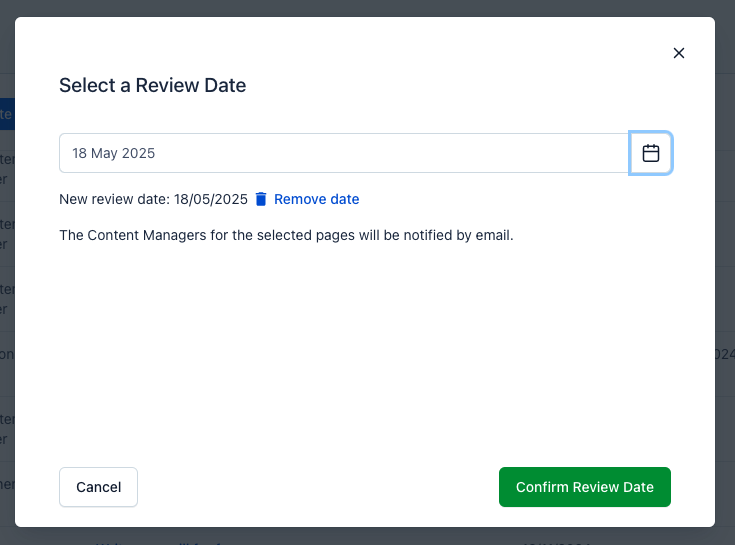
Click ‘Change review date’ > select the date you want pages to be reviewed > click ‘Confirm review date’
-
The content manager will receive an email notification that this schedule had been set.
-
When it is time for the review to be completed, the content manager will receive an automated email notification. Once this review is done, the content manager can confirm this in the page entry. They can then set the next review date in the same way above, or using the ‘Review settings’ button in the page entry itself
Note: if content is not reviewed in line with the date that has been scheduled, the entry will be highlighted in red in the content tracker. This allows us to keep on top of content where reviews are not regularly taking place.